Tumult Hype Documentation — Scenes
Scenes are a useful way to separate and organize content. They are similar to slides in a Keynote or PowerPoint presentation. Scenes contain elements and timelines. Actions are used to transition between different scenes. Each scene contains a unique set of elements and timelines; modifying an element or timeline on one scene will not affect elements or timelines on other scenes.
Managing Scenes
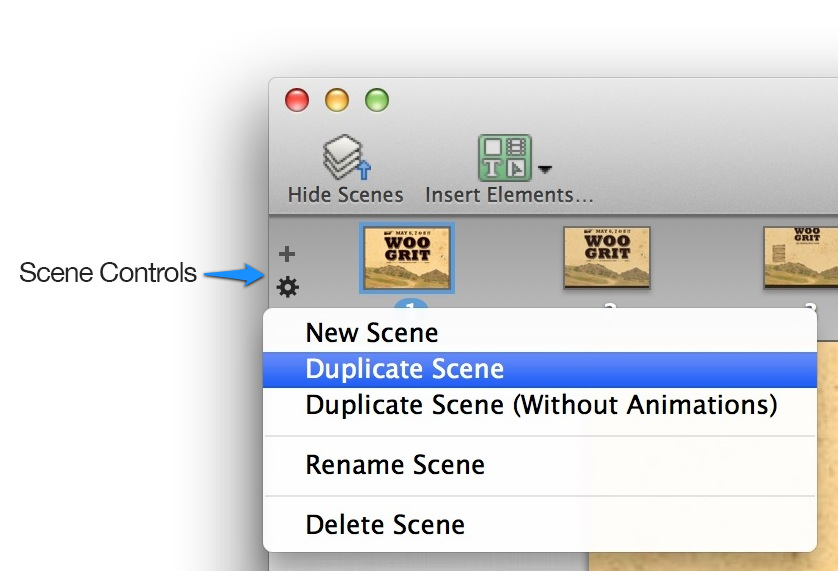
Tumult Hype’s Scene Selector offers additional control over scenes. Click the Show Scenes toolbar button to reveal the Scene Selector. New scenes can be created using the Add Scene button, and the Action menu offers many of the commands also found in the Scene menu. Scenes can be rearranged via drag-and-drop, and renamed by double-clicking on their name. Finally, scenes can be copied and pasted by selecting a scene in the Scene Selector and choosing Edit > Copy and then choosing Edit > Paste.
Every Tumult Hype document starts with one scene. The Scenes menu offers a few commands for managing scenes:
- New Scene — Creates a new scene and selects the new scene for editing.
- Duplicate Scene — Creates an identical copy of the current scene, copying all of the current scene’s elements, timelines, and animations.
- Duplicate Scene (Without Animations) — Creates an identical copy of the current scene, copying all of the current scene’s elements, but omitting the current scene’s timelines and animations. This command is surprisingly powerful, and is often used to compose complex animations that need to span multiple scenes.
- Delete Scene — Deletes the current scene, removing all associated elements, timelines, and animations.
- Go To Scene — Offers a submenu listing all of the document’s scenes, and choosing one of the scenes makes that the current scene for editing.
All scenes in a Tumult Hype document are the same size. Change the size of all scenes in a document by opening the Document inspector and either choosing a predefined size from the Default Sizes menu or by entering custom dimensions in the text fields below.
The active scene’s background color is set by the Background color well found in the Color section in the Scene inspector. To make the current document transparent and prevent all scenes from drawing their background colors, open the Document inspector and deselect the Draw Scene Backgrounds checkbox in the Options section. Actions are used to transition between different scenes. Tumult Hype affords ways to trigger actions in response to mouse events such as clicks, scene events such as timeline completion, and at specific times. All of those triggers can invoke the Jump to Scene… action with one of seven different scene transitions. The Actions chapter has more information about all of Tumult Hype’s action triggers and different actions, including the Jump to Scene… action.
Show the scene ruler by selecting View > Show Ruler, and hide them with the corresponding View > Hide Ruler command. When draging elements, Tumult Hype will show the bounds and midpoint of the selected elements on the ruler. Alignment guides appear and disappear as elements are moved on the scene. Guides assist in arranging elements relative to each other and the scene. By default, elements snap to nearby guides; this behavior can be disabled by disabling the Snap to Guides command in the Arrange menue. The scene and all elements automatically define their own alignment guides. The scene’s automatic guides define its center and edges. Likewise, every element generates automatic guides for its center and edges. Manual guides can be added to the scene, as well. Create manual guides by choosing Arrange > Guides > Add Horizontal Guides or Add Vertical Guides. Manually created guides can by dragged anywhere on the scene; drag them off the scene to delete them. The Arrange > Guides menu features many commands for showing, hiding, locking, copying, and pasting guides.
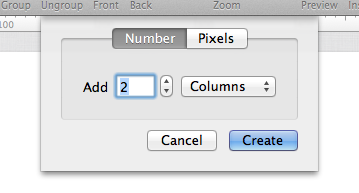
One very powerful feature in the Arrange > Guides menu is the Add Layout Guides… command. Choosing this command reveals a dialog from which guides can be created. From the dialog, you can specify either the number of columns or rows to be created, or the pixel distance between each guide. Layout Guides make arranging content in columns or rows a snap.
If you have any additional questions not covered here, please visit the scenes support forum or ask us a question.
Scene Controls
Background Color Property (Scene Inspector)
Changing Scenes
Rulers
Guides
Layout Guides Dialog
Additional questions?